PERSONAL R&D / ARTIST TOOL

Attic Dragon

Spiderweb Generator HDA and final scene integration. I built an artist-directed Houdini workflow for generating structured webs and deteriorated cobwebs, then tested it in a complete lighting and look-development scene.

Project
Attic Dragon / Spiderweb Generator
Role
Technical / Pipeline Artist and Lighting Artist
Context
Personal Houdini R&D and final-image production
Team
Solo project
Tools
Houdini, VEX, HDA and Redshift
Responsibilities
Tool design, procedural generation, lookdev, lighting and scene integration

1. Context

The project began as a lighting and look-development image built around a Chinese incense burner in an attic. I used the scene as a practical test bed for a Houdini Digital Asset that could generate both organised spiderwebs and older, damaged cobwebs.

2. Production problem

The scene needed many fine strands connecting irregular surfaces. Placing every curve by hand would make iteration slow, while a fully automatic result would give too little control over composition, density and visibility in the final shot.

Early geometric patterns also felt too regular. The tool needed to retain a readable web structure while introducing the sag, breakup and unevenness expected from an old attic.

3. My role

I designed the procedural workflow, implemented the VEX-based generation, packaged the solver stages as Houdini Digital Assets and exposed artist-facing controls. I also built the test scene, developed the web material, lit the shot and integrated the generated curves into the final image.

4. Solution

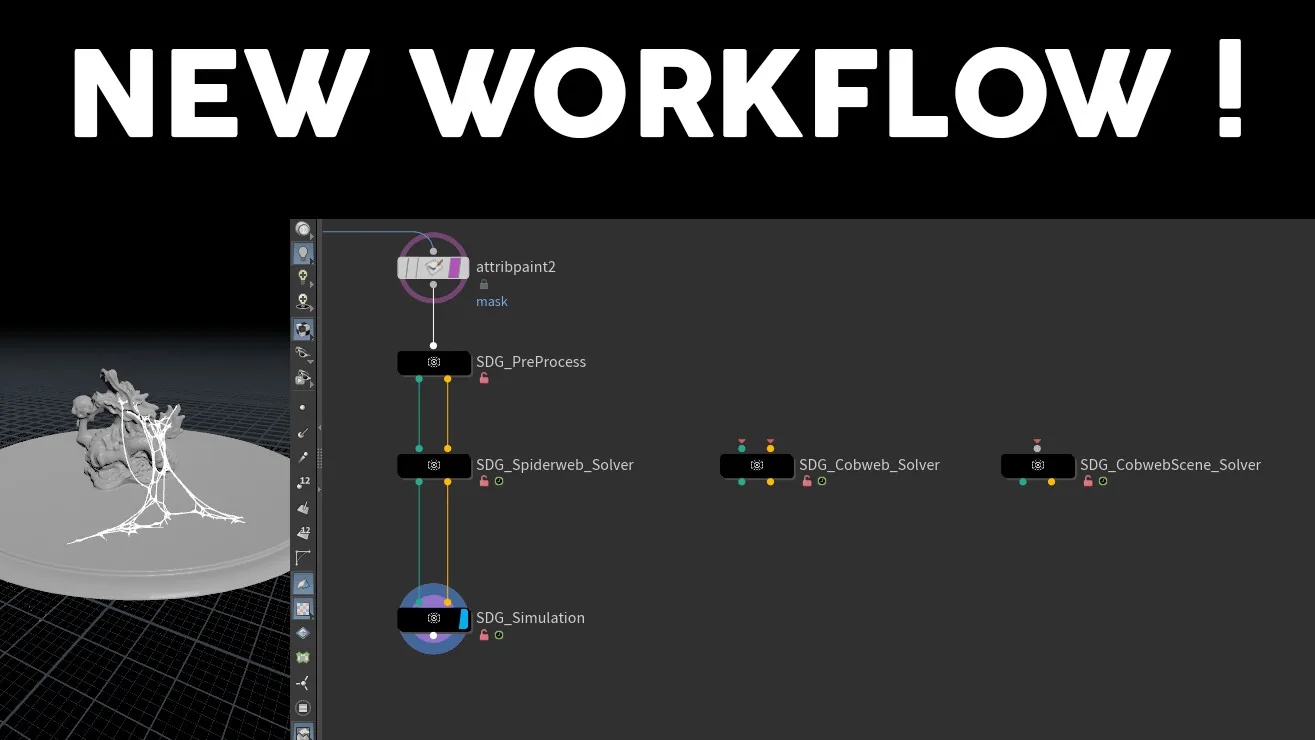
The workflow separates artist input, preprocessing, generation and final simulation. This keeps placement decisions visible while allowing the underlying procedural stages to be reused.
  1. 01 Artist input Scene geometry, anchors and painted mask
  2. 02 Preprocess Prepare eligible regions and proximity data
  3. 03 Solver choice Spiderweb, cobweb or scene-cobweb variant
  4. 04 Simulation Process the generated curves
  5. 05 Shot integration Lookdev, lighting and final composition
Published Houdini network showing preprocessing, spiderweb, cobweb and simulation HDAs
The published network exposes separate preprocessing, solver and simulation stages. The diagram above is a simplified reading of this workflow.

HDA in motion

Houdini viewport showing the generated spiderweb result used as the video poster Play technical reel

The Technical / Pipeline Reel contains the available moving-image presentation of the Houdini workflow. The player opens the full two-minute reel; the stills below isolate the HDA-specific inputs and outputs.
Artist-facing inputs

  • Scene geometry used to evaluate possible connections
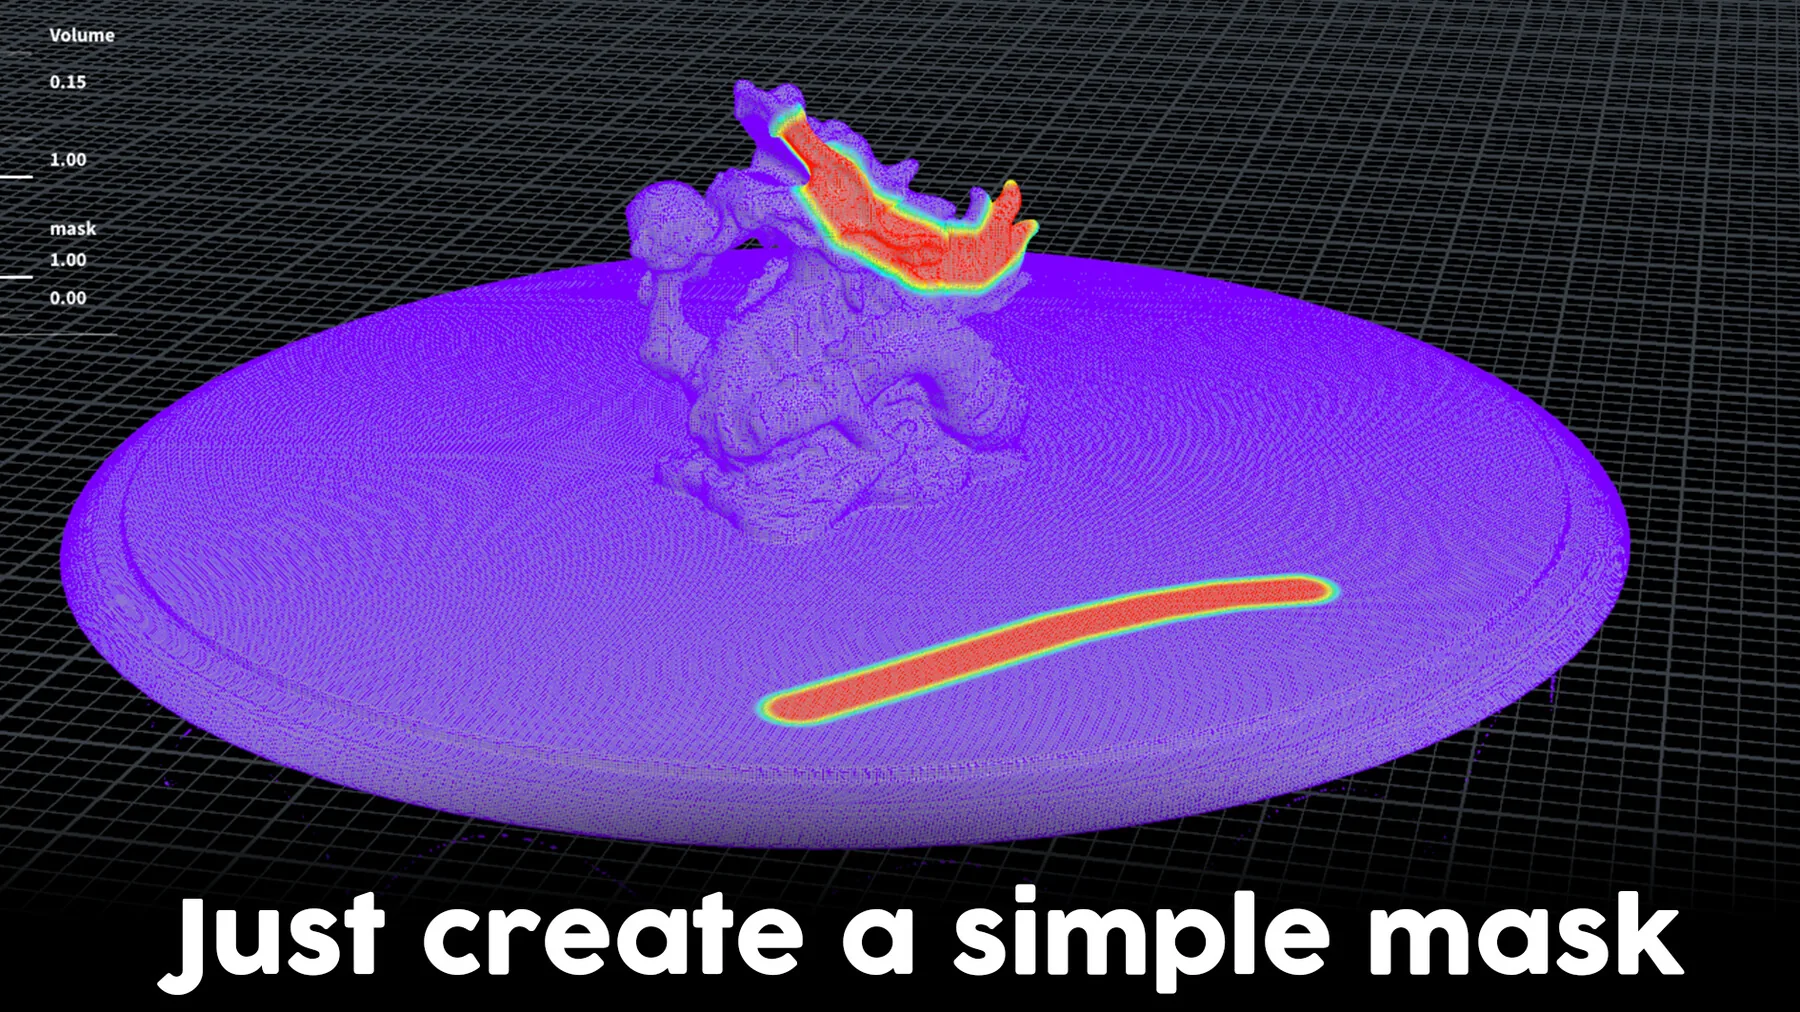
  • Painted masks to restrict generation to useful regions
  • User-defined anchor points for deliberate placement
  • Size, shape and density controls for shot-specific variation
  • Curve shaping for looser or more tensioned results
  • Separate structured-web and deteriorated-cobweb modes

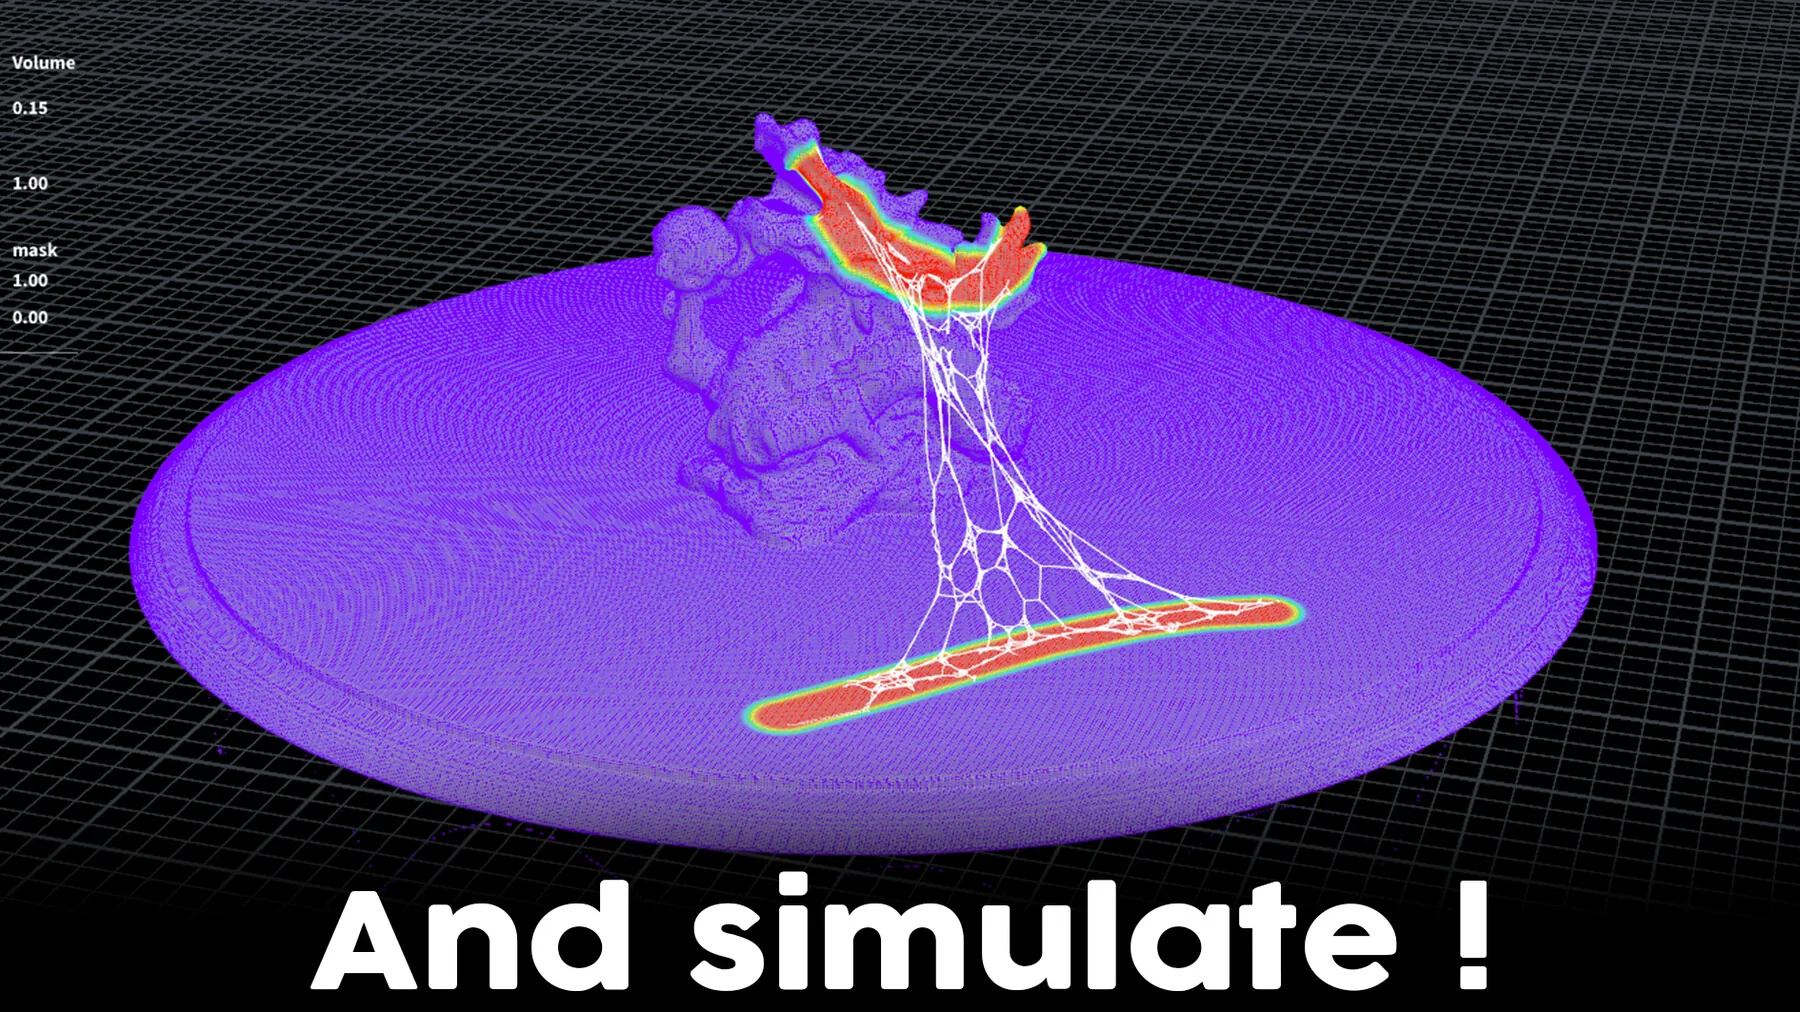
Without web / with generated web

Houdini viewport with a painted mask and no generated spiderweb
Before generation: the artist paints the regions that should participate.
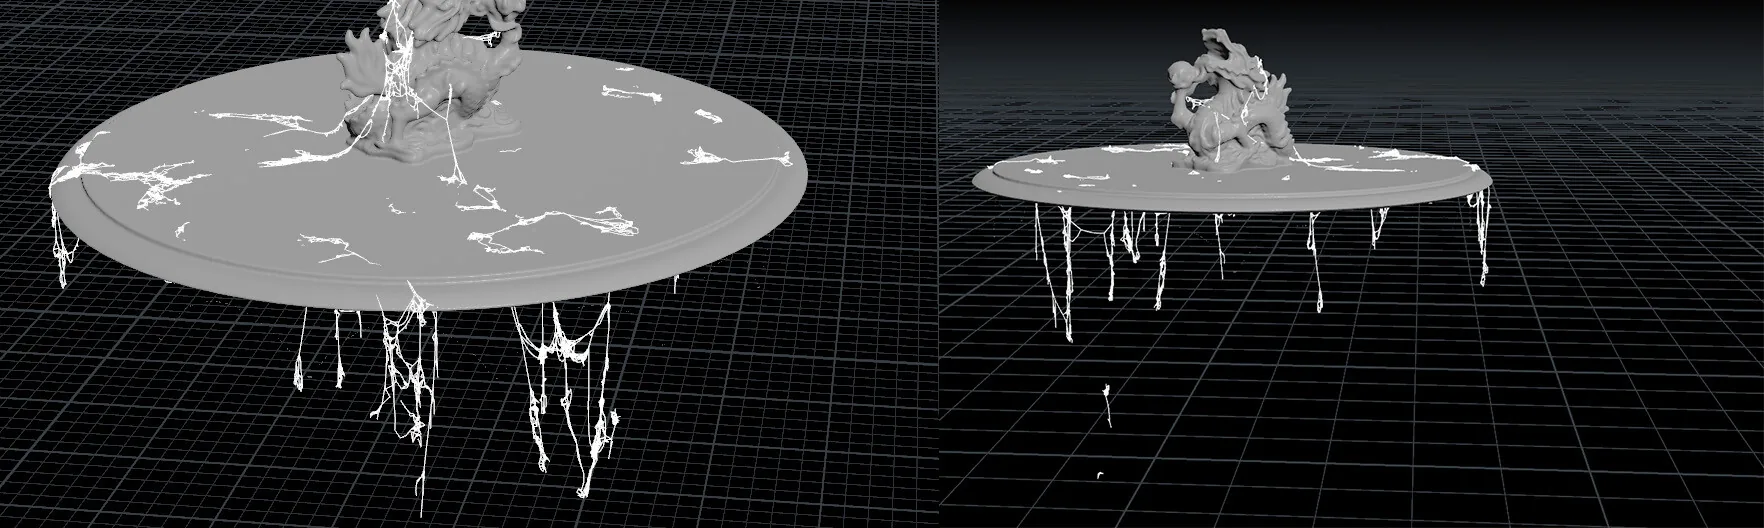
Houdini viewport after spiderweb generation between masked regions
After generation: curves connect the selected regions while remaining art-directable.

Generated results and final integration

Several deteriorated cobweb results generated around the test geometry
Different deteriorated cobweb results around the same test geometry.
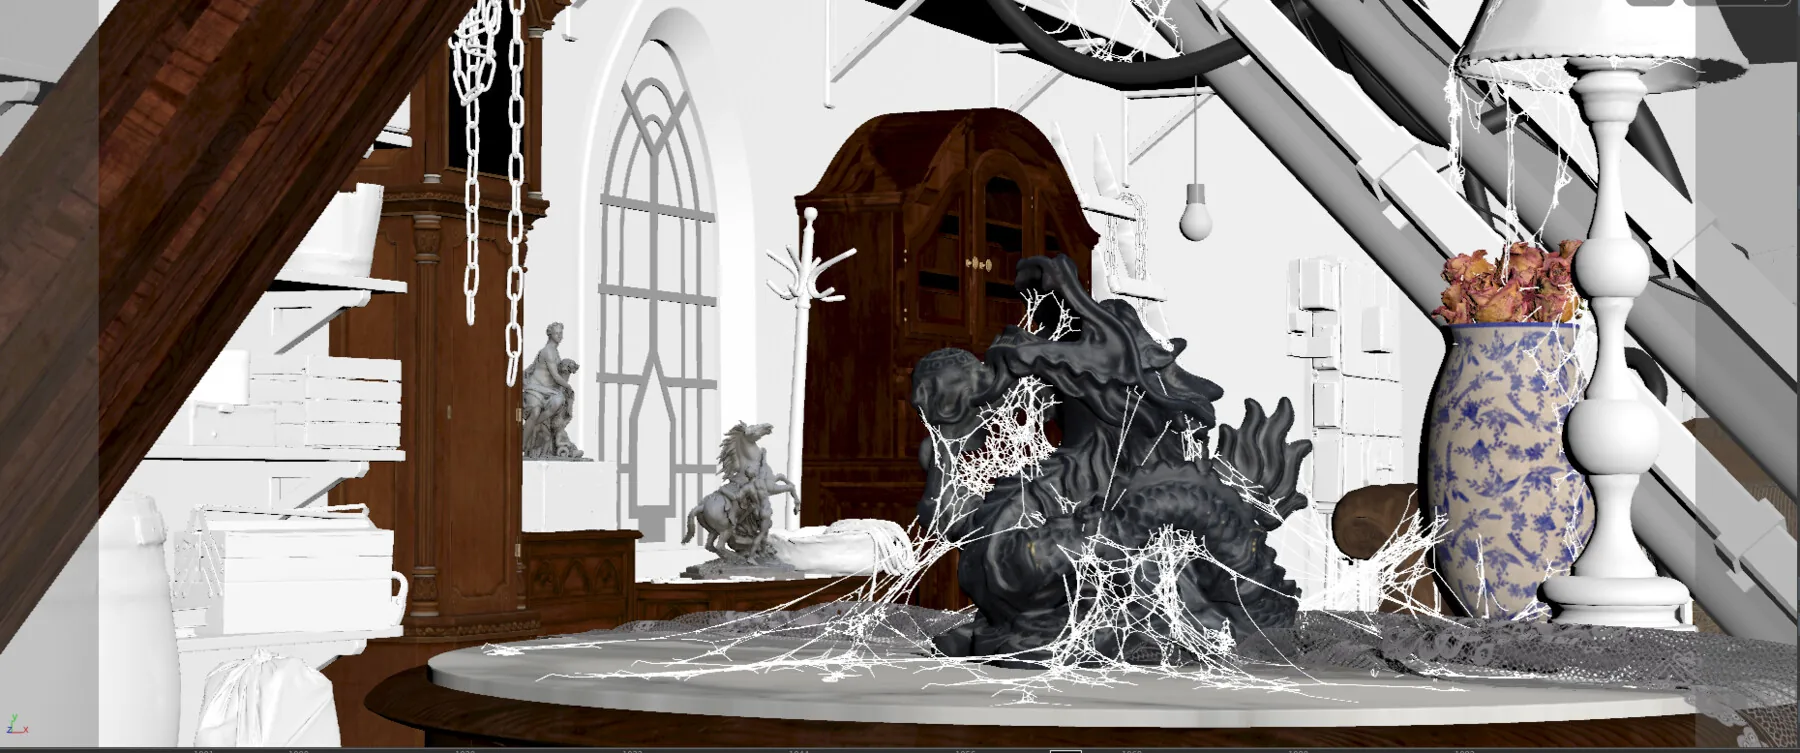
Generated spiderwebs distributed through the Attic Dragon scene in Houdini
The generated curves placed throughout the full attic scene before final rendering.
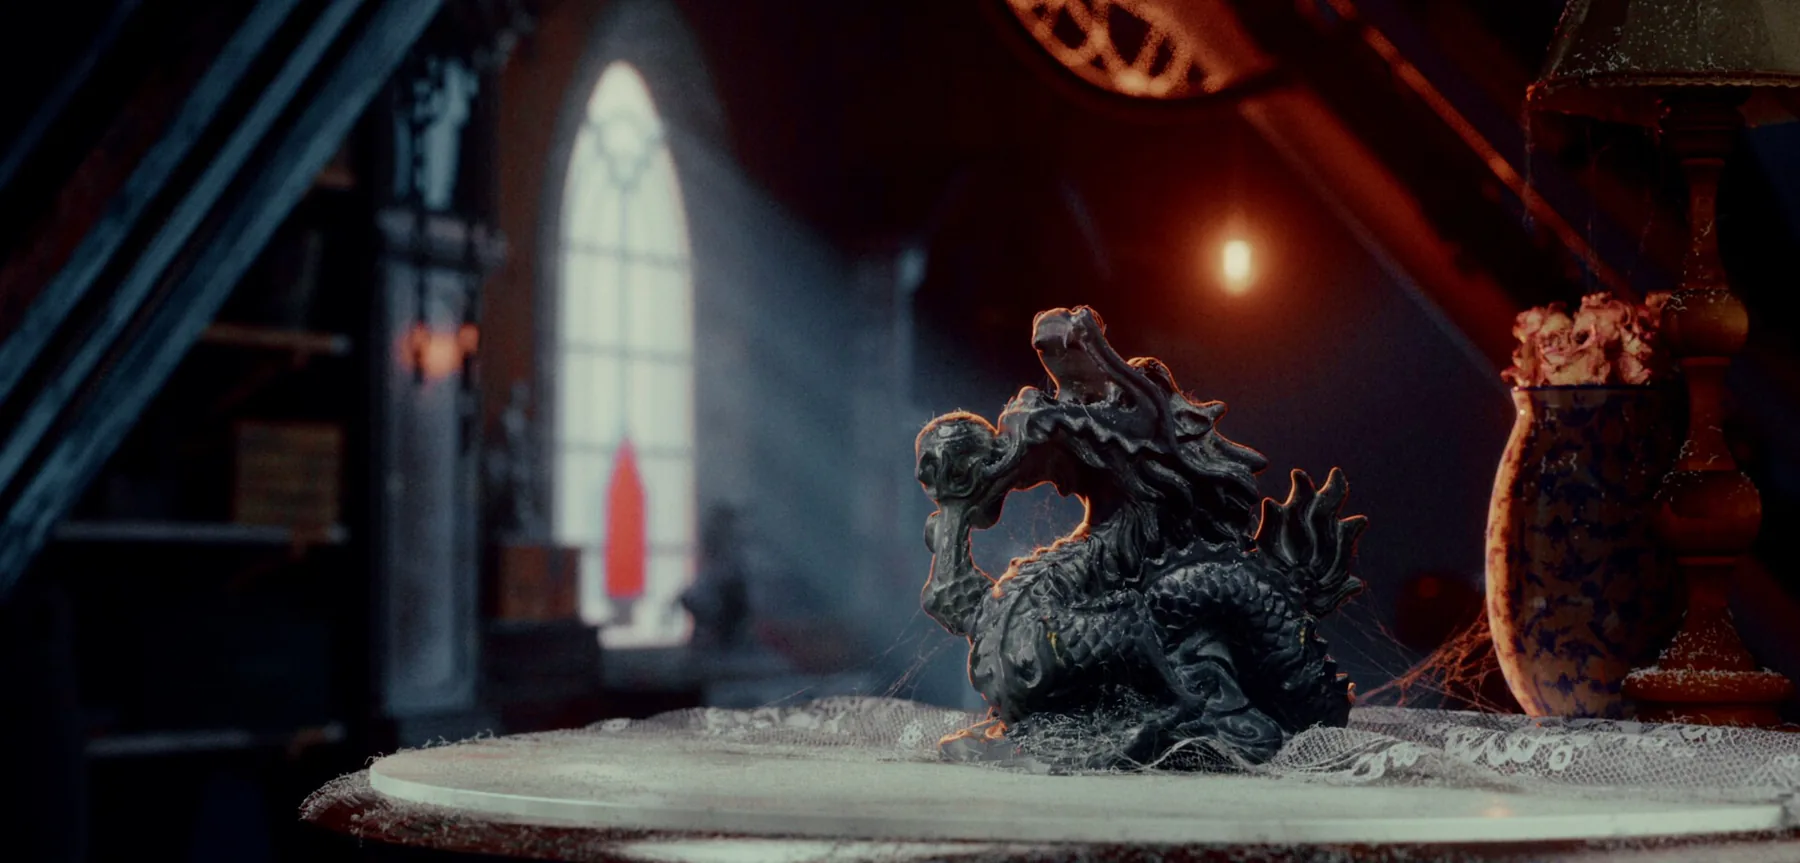
Final lit render of the Attic Dragon scene with integrated spiderwebs
Final integration: the web material and lighting were tuned together so the thin strands remain visible without dominating the focal point.

5. Production constraints

Topology and placement
The documented workflow starts from scene geometry, user anchors and a painted mask. Proximity and object shape guide eligible regions; the archived breakdown does not document behavior for non-manifold or otherwise invalid input meshes.
Density and tension
Density, size and shape remain artist-facing decisions. Curve shaping was used to move away from rigid straight connections and create looser, more organic tension.
Generation time
No measured cook time was preserved for the published build, so this page does not claim a generation-time figure. A repeatable timing test still needs to be recorded.
Rendering thin geometry
The strands had to read in the shot without becoming opaque cables. Translucency, specular response and lighting were adjusted together during look development.
Artist control
Masks and anchor points keep the procedural result subordinate to composition instead of scattering detail indiscriminately across the scene.
Packaging and maintenance
The distributed workflow is divided into preprocessing, web, cobweb, scene-cobweb and simulation HDAs. The internal networks remain packaged for distribution, while this page documents the modules, artist inputs and public system boundaries.

Problems encountered and procedural choices

Rigid curves looked artificial

I introduced irregular curve shaping so the output retained its structure without looking mathematically perfect.

Automatic placement needed art direction

I used masks and anchors because the artist should decide where detail supports the shot, not merely accept every geometrically possible connection.

One solver could not express every web type

I separated structured spiderwebs from deteriorated cobwebs so each visual problem could use a focused procedural strategy.

Manual placement would slow iteration

A procedural workflow allowed density, form and placement to be revised alongside the camera and lighting without rebuilding every strand.

6. Results

The HDA produced structured and deteriorated web variants from artist-defined regions and made their placement visible before final rendering. The same workflow was used in the Attic Dragon scene, connecting procedural tool development directly to a finished lighting image.

No defensible timing or error-reduction metric was recorded for this personal project. The evidence shown here is therefore visual and architectural rather than presented as a production benchmark.

What I learned

I learned that procedural geometry is only useful when artists can constrain where it acts. Separating preprocessing, solver choices and simulation made the workflow easier to reason about. Testing the generated curves in the final lighting setup kept technical decisions tied to the image.

Credits and confidentiality

Production
Personal R&D and artwork project
Exact role
Tool design and development, procedural setup, lookdev, lighting and final integration
Work by others
No third-party artistic contribution is credited in the public project notes. Houdini and Redshift are third-party software.
Confidentiality
No NDA. The artwork, HDA package and technical breakdown are publicly documented on ArtStation.